In this article you will learn how to setup user account and define access levels in cPanel. If you’re managing a team or want to grant someone limited access to your website’s backend, cPanel allows you to create additional user accounts with customised access levels. This ensures your site stays secure while still allowing collaboration.
You can define what each user can see and do in cPanel by creating FTP, email, or database users, or by using cPanel’s User Manager to set up web disk access and more.
TABLE OF CONTENTS
How To Setup User Account In cPanel
This article assumes that you have already logged in to your Domains.co.za account and have accessed cPanel via your Hosting account, or that you are logged in to the cPanel Dashboard.
Create a User Account In cPanel
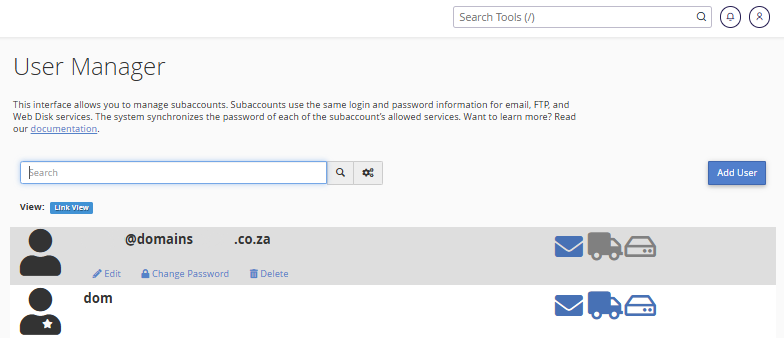
1. In cPanel, scroll to Preferences and click User Manager.

2. Click Add User in the top-right corner.

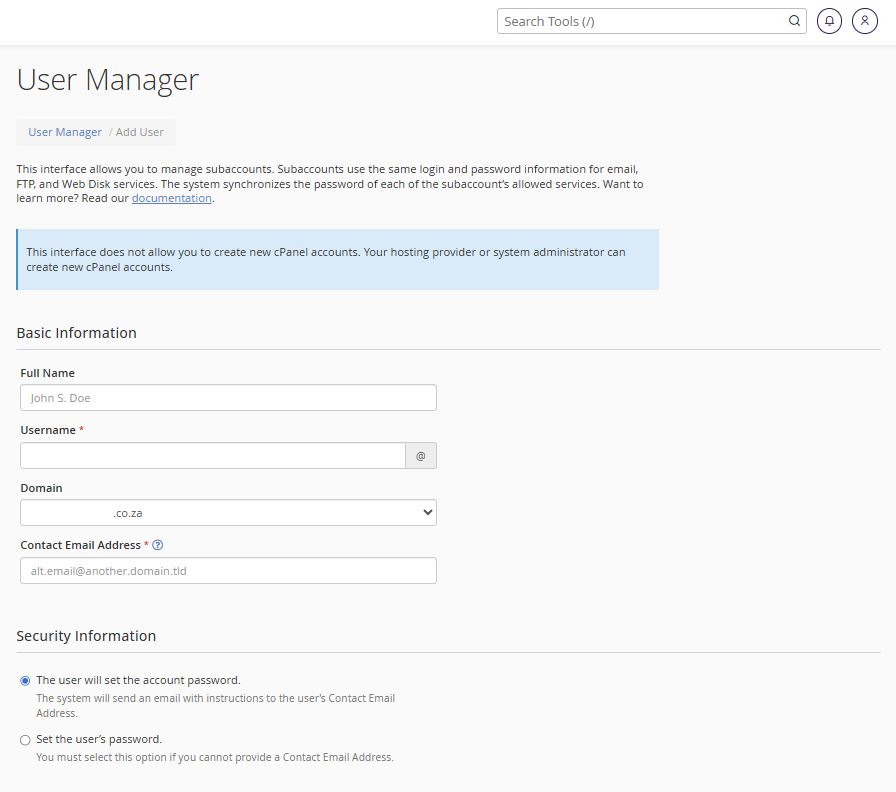
3. Fill in the user’s Full Name, Username, and Email Address.

4. Set a password manually or generate a secure one using the built-in password generator.
Define User Account Access Levels
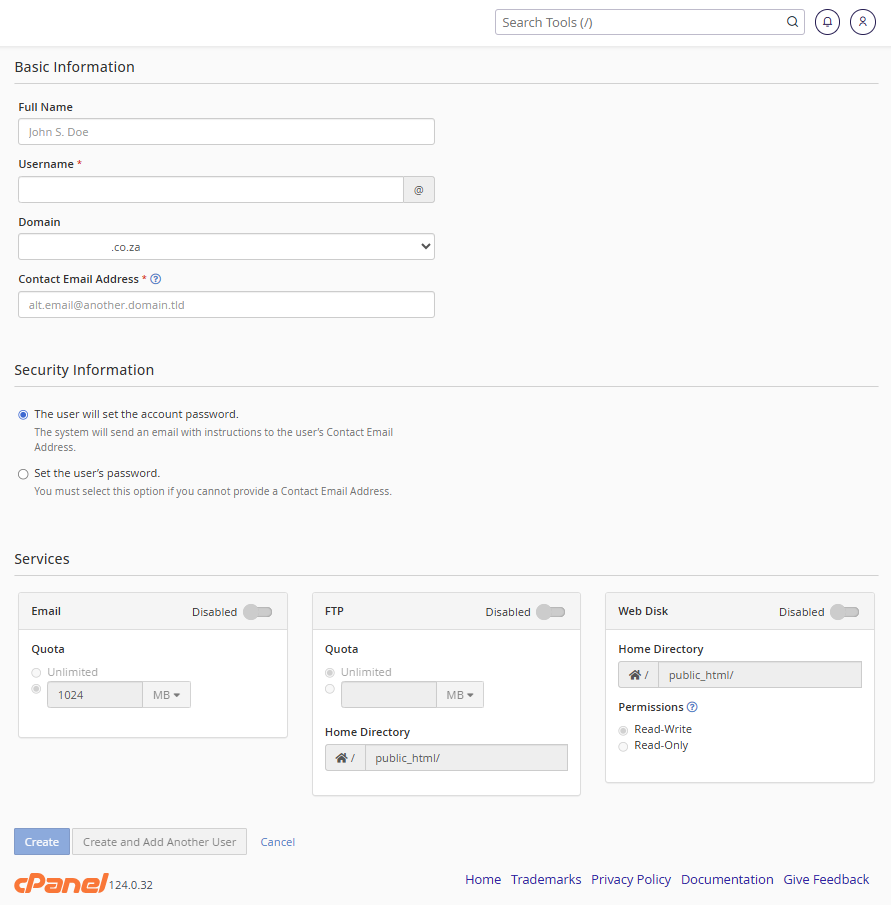
5. Under Services, you can define what the user has access to:
- Email: Create a new email account with the chosen username.
- FTP: Allow access to a specified folder on the server via FTP.
- Web Disk: Enable or restrict access to files via WebDAV.

Customising Access Levels
- FTP Access: Limit users to specific directories to prevent them from accessing sensitive site files.
- Web Disk Access: Choose read-only or read-write permissions for file access.
- Email Only: If the user only needs a mailbox, disable FTP and Web Disk services.
- Database Access: Grant access by creating MySQL users via MySQL® Databases in cPanel and assigning them to the appropriate databases.
6. Click Create to finish adding the user.
Additional Information
General User Account Information
- Best Practice: Only provide users access to the services they need. This limits the risk of accidental changes or data loss.
- Changing Permissions: You can return to the User Manager at any time to edit, suspend, or delete user accounts.
- Disk Quotas: Set limits on disk usage for FTP and Web Disk users to control storage usage.
- Email Limits: Configure email sending limits and quotas under Email Accounts in cPanel.
- Two-Factor Authentication (2FA): For additional security, consider enabling 2FA for your cPanel login.
- Monitoring Access: Use Raw Access or Awstats in cPanel to monitor user activity on your server.
- User Roles in Teams: Consider assigning roles (e.g., developer, content editor, support) with predefined access templates for consistency.
Login to Domains.co.za Account
1. Go to the Domains.co.za website Account Login page.

2. Enter your Email and Password and click the Sign In button.
3. You will see the Domains.co.za Dashboard, displaying the Manage Account menu on the left and your Account Information, Account Overview and Open Support Tickets on the right.

Login to cPanel from your Domains.co.za Dashboard
4. Click on Manage Services to view the sub-dropdown menu and select the hosting package for the domain you want to work with – in our example we are using Web Hosting.

5. Click the Manage button to the right of the domain name you want to access.
6. The display will now show Product Information, Quick Manage, Resource Usage and Site Statistics for that domain name.

7. Under Product Information, scroll down to Control Panel, which will display cPanel to the right, and click on the Login button.

8. The cPanel Dashboard will now be displayed.


