This guide will show you how to delete the WordPress Uncategorized category so that your website stays organised and presents itself professionally. When a post in WordPress does not have a category assigned to it, it will automatically be default to the Uncategorized category.
Although you cannot immediately remove this default category, there are techniques to adjust it to be more effective and in alignment with your WordPress website’s other categories, for example, you can either rename it and then delete it, or just rename it to something more useful.
This Knowledgebase article assumes that you are already logged in to your WordPress website’s dashboard and is related to our our You Tube video “Tidy Up Your Categories: How to Delete Uncategorized in WordPress“.
TABLE OF CONTENTS
How to Delete the WordPress Uncategorized Category
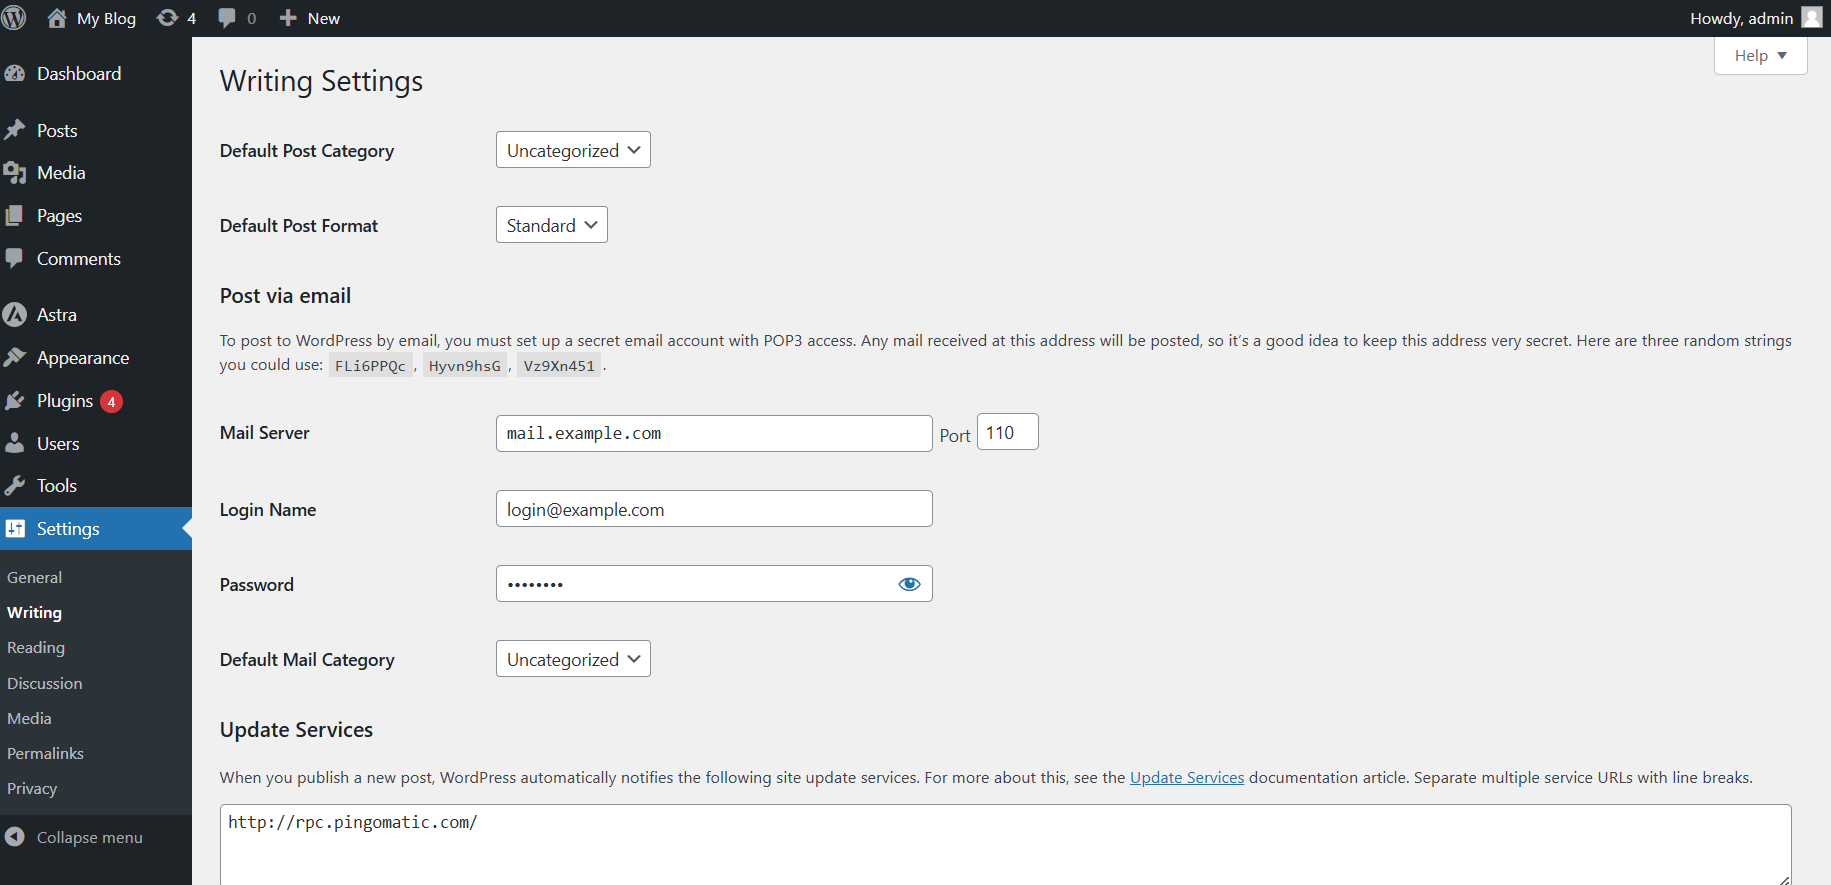
1. In your WordPress website dashboard main page, scroll down the left-hand menu, hover over “Settings”, then click “Writing”. This will take you to the “Writing Settings” page.

2. On the Writing Settings page, find the Default Post Category option and use the dropdown menu to select a new default category.
3. If you don’t have another category, create one by going to Posts > Categories and adding a new one and click Save Changes to update the default category.
4. In the left-hand menu hover over Posts, then click Categories and you will be taken to a page to manage your categories.

5. To rename the Uncategorized category, hover over it in the list on the right side of the page and click Quick Edit.
6. Change the name and slug to something meaningful, then click Update Category.
7. To delete the Uncategorized category, hover over it and click Delete.
Note that you can only delete it after you change the default category.
– You Tube Video: Tidy Up Your Categories: How to Delete Uncategorized in WordPress
Additional Information
Reassign Posts to a New Category: You can move posts currently in Uncategorized to a different category. Navigate to the Posts section, pick the posts you wish to reassign, click Apply, then select Edit from the Bulk Actions dropdown menu. After that, click Update once you have chosen the new Category.
Using Plugins for Category Management: You can manage categories more effectively using the available plugins. Bulk Move, for instance, allows you to ‘bulk transfer’ posts between categories.
SEO Considerations: Posts under the Uncategorized category can appear amateurish and could impact your website’s Search Engine Optimization (SEO). We recommend you give each of your posts a meaningful category.
Regular Maintenance: Make sure your categories are up to date and arranged properly by reviewing them on a regular basis. This maintains the organization of the material on your website and enhances user experience.
Login to Domains.co.za Account
1. Go to the Domains.co.za website Account Login page.

2. Enter your Email and Password.
3. Then click the “Sign In” button.

Access WordPress from your Domains.co.za Dashboard
4. On the right of the Dashboard under the “Manage Account” menu, click “Manage Services” on the drop-down menu and select your Hosting plan, our example uses Web Hosting.

5. Scroll down to the “Quick Manage” section (below “Product Information”) and click on the WordPress icon. If you haven’t yet installed WordPress, it will ask you to first do so.
Access WordPress via cPanel from your Domains.co.za Account
6. On the right of the Dashboard under the “Manage Account” menu, click “Manage Services” on the drop-down menu and select your Hosting plan, our example uses Web Hosting. (refer image above).
7. Click “Manage” next to the website domain you wish to access in cPanel.

8. The Product Information section will display – click the “Login” button next to Control Panel.

9. On the cPanel Dashboard, in the menu on the right, select “WP Toolkit”, or if you haven’t yet installed WordPress “WordPress Management”.

10. There is also a WordPress icon under the “Popular Applications” section on the cPanel Dashboard.
WordPress can be Accessed Online via cPanel
1. Go to your cPanel URL or cPanel Login page.

2. Enter your “Email” and “Account Password” and click “Log In”
3. On the cPanel Dashboard, in the menu on the right, select “WP Toolkit”, or if you haven’t yet installed WordPress “WordPress Management”. There is also a WordPress icon under the “Popular Applications” section on the cPanel Dashboard.


