MX records are used to direct emails sent to your domain as to where they should be delivered. Properly managing MX records ensures your email service works smoothly, whether you use hosting from Domains.co.za or a third-party provider like Google Workspace or Microsoft 365.
With Web Hosting from Domains.co.za and cPanel, you can easily add, edit, or remove MX records to control your email routing.
TABLE OF CONTENTS
How to Manage MX Records in cPanel
This article assumes that you have already logged into your Domains.co.za Account and have accessed the cPanel Dashboard – refer below for steps on how to do this.

1. In the cPanel Dashboard – Tools, scroll down to Domains and click Zone Editor

2. Find your domain and click Manage.

Edit a MX Record
3. Locate existing MX records in the list. To edit, click Edit next to the record.
Add a MX Record
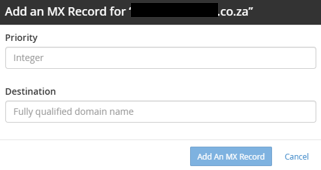
4. To add a new MX record, click + Add Record, then choose MX from the dropdown.

5. Enter the Priority and Destination (mail server) details.
6. Click Save Record to apply your changes.
Delete a MX Record
7. To delete an MX record, click Delete next to the unwanted record and confirm.
Additional Information
What are MX Records?
These are DNS records that specify the mail servers responsible for receiving email on behalf of your domain.
Why Priority Matters?
Lower numerical priority means higher priority. Emails are routed to the lowest priority mail server available.
MX Records General Info
- Use Correct Mail Servers: When using third-party email services (e.g., Google Workspace), you must use their MX records exactly.
- Propagation Time: Changes to MX records can take up to 24 hours to propagate across the internet.
- Back up Before Changes: Always note your current MX settings before making changes.
- Test Email Delivery: After updating, test your email by sending and receiving messages to ensure proper routing.
- SPF, DKIM & DMARC: Proper MX records work alongside SPF, DKIM, and DMARC to improve email deliverability and security.
- Multiple MX Records: Having multiple MX records provides redundancy in case one mail server is down.
- Check for Conflicts: Avoid conflicting MX records to prevent delivery issues.
- Contact Support if Needed: If you are unsure about the correct MX values, Domains.co.za support will assist you.
Login to Domains.co.za Account
1. Go to the Domains.co.za Login website page.

2. Enter your Email and Password and click the “Sign In” button.
3. You will see the Domains.co.za Dashboard, displaying the Manage Account menu on the left and your Account Information, Account Overview and Open Support Tickets on the right.

Login to cPanel from your Domains.co.za Dashboard
4. Click on Manage Services to view the sub-dropdown menu and select the hosting package for the domain you want to work with – in our example we are using Web Hosting.

5. Click the Manage button to the right of the domain name you want to access.
6. The display will now show Product Information, Quick Manage, Resource Usage and Site Statistics for that domain name.

7. Under Product Information, scroll down to Control Panel, which will display cPanel to the right, and click on the Login button.

8. The cPanel Dashboard will now be displayed.


