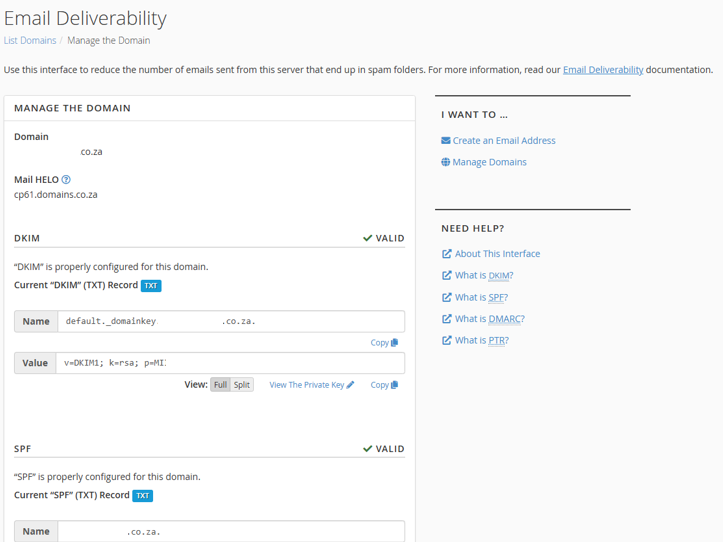
Learn how to endable SPF and DKIM records in your cPanel. SPF (Sender Policy Framework) and DKIM (DomainKeys Identified Mail) are two essential email authentication methods that help protect your domain from spoofing and ensure your emails reach inboxes instead of spam folders.
With web hosting from Domains.co.za, you can enable SPF and DKIM in just a few clicks through cPanel’s Email Deliverability tool.
TABLE OF CONTENTS
How to Enable SPF & DKIM Records in cPanel
This article assumes that you have already logged into your Domains.co.za Account and have accessed the cPanel Dashboard – refer below for steps on how to do this.
1. In the cPanel Tools Dashboard scroll to Email and click Email Deliverability.

2. Find your domain name in the list and click Manage next to the domain.

3. Review the SPF and DKIM status – if either is missing or broken, cPanel will show a warning.
4. Click Repair to generate and enable the SPF and DKIM records automatically.
5. Confirm that the records have been successfully updated.
Additional Information
What is a SPF Record?
An SPF record is a DNS TXT entry that authorises specific mail servers to send emails for your domain.
What are DKIM Records?
DKIM adds a digital signature to your emails, verifying they haven’t been altered during transmission.
Why Enable SPF & DKIM Records
- Prevent email spoofing.
- Improve email deliverability and reputation
- Reduce the risk of being blacklisted by spam filters.
SPF & DKIM Records General Info
- Email Providers & DMARC: Most email providers (like Gmail and Outlook) prefer domains with valid SPF and DKIM records, especially when used with DMARC.
- Set & Forget: Once enabled, SPF and DKIM records rarely need updating unless you switch email services.
- Works with Third-Party Mail Services: If you use services like Google Workspace or Microsoft 365, you’ll need to adjust SPF/DKIM accordingly.
- Check for Propagation: DNS changes (including SPF/DKIM) can take up to 24 hours to fully propagate.
- Testing Tools: Use tools like MXToolbox or Mail-Testerto verify your SPF and DKIM setup after enabling.
- Combine with DMARC: For complete protection, consider setting up a DMARC record to monitor and enforce email authentication.
- Always Back up: Before manually editing DNS records, ensure you save a copy of the current settings.
Login to Domains.co.za Account
1. Go to the Domains.co.za Login website page.

2. Enter your Email and Password and click the “Sign In” button.
3. You will see the Domains.co.za Dashboard, displaying the Manage Account menu on the left and your Account Information, Account Overview and Open Support Tickets on the right.

Login to cPanel from your Domains.co.za Dashboard
4. Click on Manage Services to view the sub-dropdown menu and select the hosting package for the domain you want to work with – in our example we are using Web Hosting.

5. Click the Manage button to the right of the domain name you want to access.
6. The display will now show Product Information, Quick Manage, Resource Usage and Site Statistics for that domain name.

7. Under Product Information, scroll down to Control Panel, which will display cPanel to the right, and click on the Login button.

8. The cPanel Dashboard will now be displayed.


