In this tutorial, we’ll guide you through the process how to install Zen Cart via Softaculous using the cPanel Dashboard, available to users on Domains.co.za’s Hosting plans. Please ensure you’re logged into cPanel before we begin.
Zen Cart is an open-source ecommerce platform that provides a useful solution for building and managing online stores. Originally developed as an extension of eCommerce, it has since evolved into a distinct platform known for its community support, customisation options, and user-friendly design.
TABLE OF CONTENTS
Installing Zen Cart from Softaculous
This article assumes that you are already in your cPanel Dashboard. You can either login via your Domains.co.za Account, or online via the cPanel website.
1. Zen Cart can be found under the dropdown list for E-Commerce, so expand this menu and select it from the list.

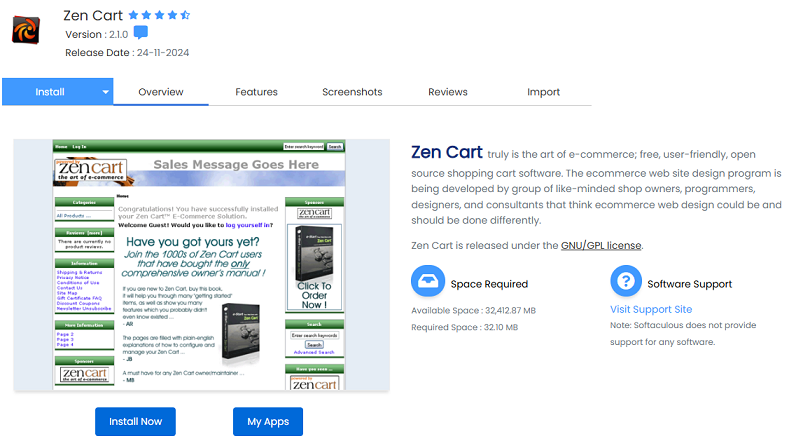
2. Once you click Zen Cart – You will be taken to the Overview page where you can view more information about this particular software.

For Zen Cart Quick Install
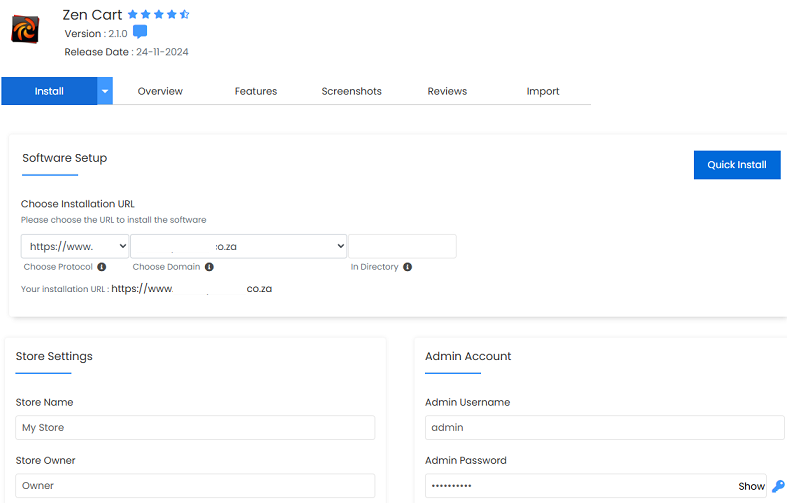
3. Click the Quick Install from the Install tab. The next two boxes require your selected domain and the directory. The directory is relative to your domain and should not exist. e.g. To install at http://mydomain/dir/ just type dir. To install only in http://mydomain/ leave this empty.

4. Fill in your Admin Account details and click Install.
For Zen Cart Custom Install
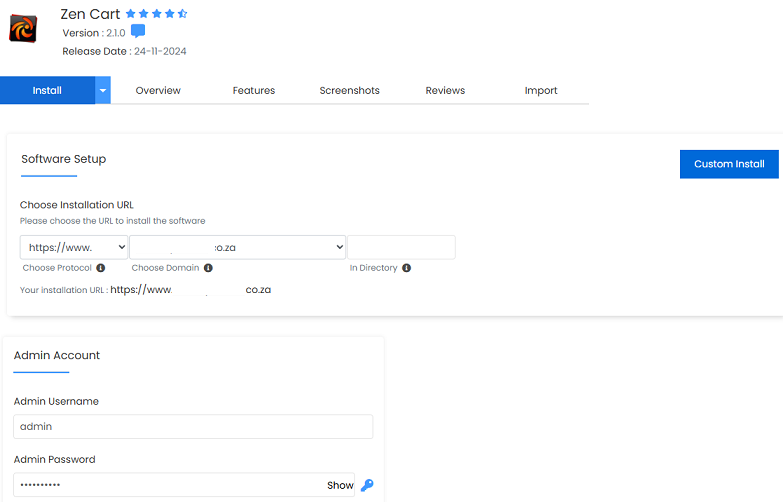
3. The Custom Install process is similar, simply select the option from the Install tab. Under Software Setup choose your protocol, domain, and directory, which should be empty. If you have multiple domains on one account, you can select where to install.

NOTE:
The directory is relative to your domain and should not exist. e.g. To install at http://mydomain/dir/ just type dir. To install only in http://mydomain/ leave this empty.
4. Under Store Settings, enter a Store Name, Store Owner and Store Address. Next, fill in your Admin Account details, including Admin Email and select the language. These can be changed later from the admin panel of the software.
After Zen Cart Quick and Custom Installations
5. After clicking Install in both processes, the software will be installed, and you can view your new site by clicking the Installation link.
That’s it, our new Zen Cart installation will be ready for use. You’ve reached the end of the tutorial, and you now know how to install TinyWebGallery from Softaculous.
Additional Information
Benefits Of Using Zen Cart
Zen Cart is an open-source e-commerce platform that offers a range of benefits for businesses setting up an online store:
- Open Source and Free – Zen Cart is both free and open-source, allowing anyone to use and modify it to fit their specific needs. This makes it an affordable option for businesses of all sizes.
- Customisation – Businesses can tailor their online stores with Zen Cart’s extensive customisation options. Users can add or remove features, modify the store’s appearance, and incorporate additional modules and extensions.
- User-Friendly Interface – Zen Cart features an intuitive interface that is easy for both store owners and customers to navigate. It provides user-friendly tools for managing products, orders, customers, and other aspects of the online store.
- Extensive Feature Set – The platform includes a comprehensive set of features necessary for e-commerce, such as multiple payment gateways, product and inventory management, order processing, shipping and tax calculations, and more.
- SEO-Friendly – Designed with search engine optimisation (SEO) in mind, Zen Cart helps businesses enhance their online visibility and search rankings. It includes features like meta tags, sitemaps, and SEO-friendly URLs.
- Community Support – Zen Cart benefits from a large and active community of users, developers, and designers who provide support, share resources, and contribute to the platform’s development. Users can access documentation, forums, tutorials, and other helpful resources.
- Secure – Security is a major focus for Zen Cart. The platform regularly releases updates and patches to address vulnerabilities and protect against security threats, helping businesses safeguard their customers’ data.
- Scalability – Zen Cart is designed to grow with your business. Whether you’re starting small or planning for future expansion, Zen Cart can handle increasing traffic and scale to meet your evolving needs.
Login to Domains.co.za Account
1. Go to the Domains.co.za Login website page.

2. Enter your Email and Password and click the Sign In button.
3. You will see the Domains.co.za Dashboard, displaying the Manage Account menu on the left and your Account Information, Account Overview and Open Support Tickets on the right.

Login to cPanel from your Domains.co.za Dashboard
4. Click on Manage Services to view the sub-dropdown menu and select the hosting package for the domain you want to work with – in our example we are using Web Hosting.

5. Click the Manage button to the right of the domain name you want to access.
6. The display will now show Product Information, Quick Manage, Resource Usage and Site Statistics for that domain name.

7. Under Product Information, scroll down to Control Panel, which will display cPanel to the right, and click on the Login button.

8. The cPanel Dashboard will now be displayed.


