






This acrticle will show how to reinstall WordPress and how it can help resolve persistent errors, failed updates, corrupted core files, or issues caused by a compromised website. While reinstalling your website may sound risky, it is usually possible to reinstall WordPress without losing your posts, pages, media files, themes, and plugins, provided you first take the proper precautions.
Before making any changes, always create a complete backup of your website files and database. A backup provides a recovery point if anything goes wrong during the reinstallation process.
If you’re using WordPress Hosting from Domains.co.za, you can access tools such as cPanel, File Manager, FTP access, and phpMyAdmin to help you safely complete the process.
TABLE OF CONTENTS
Before You Reinstall WordPress
Before reinstalling WordPress, take the following precautions:
- Create a complete backup of your website files.
- Create a backup of your WordPress database.
- Confirm that you know your WordPress administrator login details.
- Record your database name, username, password, and host information if you plan to use manual methods.
- Check whether the issue can be fixed with simpler troubleshooting.
- Use a staging environment if one is available.
- Contact support if you are unsure about any step.
Your website content is primarily stored in two locations:
- The database, which contains posts, pages, comments, settings, and user information.
- The wp-content folder, which contains themes, plugins, and media uploads.
These should be protected throughout the reinstallation process.
When Should You Reinstall WordPress?
Reinstalling WordPress can be useful when:
- WordPress core files are missing or corrupted.
- Your website displays persistent errors after updates.
- The WordPress dashboard behaves unexpectedly.
- Your website has been compromised by malware.
- Important functionality stopped working after a WordPress update.
- Plugin, theme, and cache troubleshooting have not resolved the issue.
Before reinstalling WordPress, try:
- Clearing website and browser cache.
- Deactivating recently installed plugins.
- Switching temporarily to a default WordPress theme.
- Reviewing error logs in cPanel.
- Checking for hosting or server-related issues.
Step 1: Back Up Your WordPress Website
A complete backup should include:
- Website files.
- WordPress database.
Back Up Using a Plugin
A backup plugin such as UpdraftPlus can simplify the process.
1. Login to the Domains.co.za Customer Portal using your account credentials.
2.Navigate to Manage Services from the dropdown menu.
3. Select your WordPress Hosting package and click Manage.
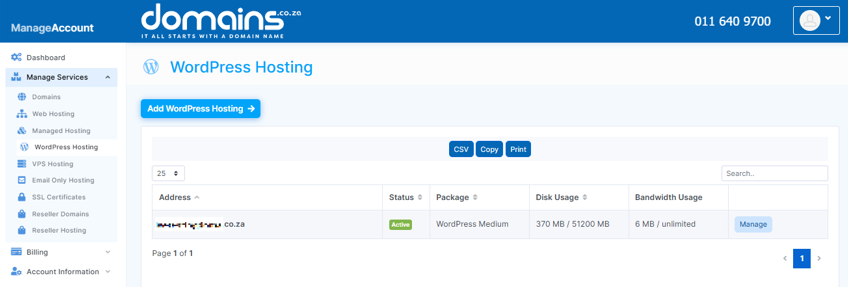
4. Click Login to cPanel to access your hosting control panel.
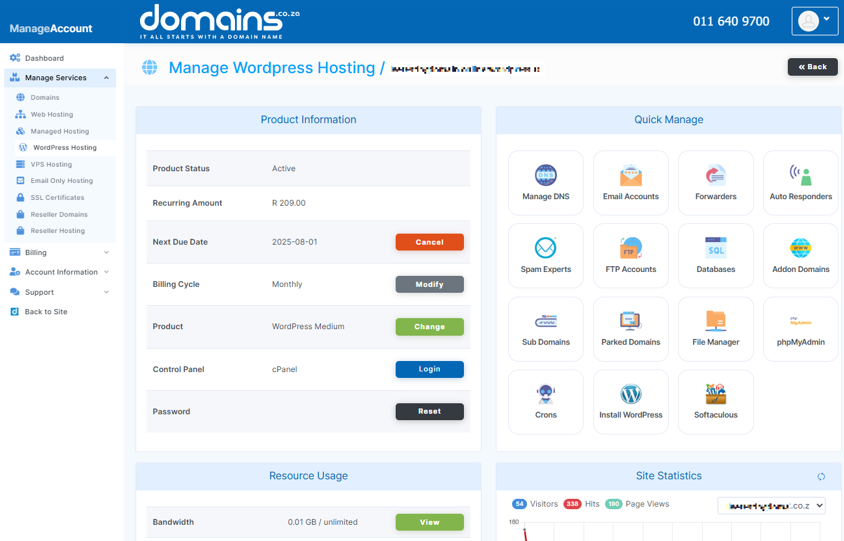
5. In cPanel, locate and open the WordPress Manager.

6. Search for and install a backup plugin.
7. Activate the plugin.
8. Create a full backup of both files and database.
9. Download the backup to your computer or save it to a cloud storage service.
Back Up Using cPanel
1. Login to the Domains.co.za Customer Portal using your account credentials.
2. Navigate to Manage Services from the dropdown menu.
3. Select your WordPress Hosting package and click Manage.
4. Click Login to cPanel to access your hosting control panel.
5. Open File Manager.
6. Locate your WordPress installation directory, usually public_html.
7. Compress the website files into a ZIP archive.
8. Download the archive to your computer.
9. Return to cPanel and open phpMyAdmin.
10. Select your WordPress database.
11. Click Export and download the database backup.
Back Up Using FTP
1. Connect to your hosting account using an FTP client such as FileZilla.
2. Open the WordPress installation folder.
3. Download all website files to your local computer.
4. Login to phpMyAdmin separately.
5. Export and download the WordPress database.
Step 2: Reinstall WordPress from the Dashboard
This is the safest and easiest method if you can still access your WordPress Dashboard.
1. Login to WordPress.
2. Navigate to Dashboard > Updates.
3. Click Reinstall Now.
4. Wait while WordPress downloads and reinstalls its core files.
5. Once complete, review your website.
Test:
- Homepage functionality.
- Key pages.
- Contact forms.
- Navigation menus.
- WordPress administration features.
NOTE::
This process reinstalls WordPress core files only. It does not reset your website content or remove your themes and plugins.
Step 3: Reinstall WordPress Using FTP
Use this method if you cannot access the WordPress Dashboard or need greater control over the process.
1. Download the latest version of WordPress from WordPress.org.
2. Extract the downloaded files on your computer.
3. Connect to your hosting account using FTP.
4. Open your WordPress installation directory.
5. Upload the new WordPress files.
6. Allow the new core files to overwrite the existing core files.
7. Visit your website and verify functionality.
IMPORTANT:
Do not delete or overwrite this folder unless you have a verified backup and understand the consequences.
The wp-content folder contains:
- Themes.
- Plugins.
- Uploaded media files.
Step 4: Reinstall WordPress Using WP-CLI
This method is recommended only for advanced users familiar with SSH and command-line administration.
WP-CLI is a command-line tool used to manage WordPress installations.
wp core download–force
wp core update-db- Create a full backup.
- Confirm you are in the correct WordPress directory.
- Verify SSH access is functioning correctly.
- Ensure you understand the commands being executed.
Step 5: When to Start Fresh Instead
Sometimes reinstalling WordPress core files is not enough.
A completely fresh installation may be necessary when:
- The website has been severely compromised.
- The database has become corrupted.
- You plan to rebuild the website from scratch.
- Legacy themes or plugins continue causing issues.
- You have a verified backup and restoration plan.
Starting over completely can result in the loss of:
- Website files.
- Themes.
- Plugins.
- Uploads.
- Database content.
Only proceed if you have a tested backup or assistance from an experienced developer or hosting support team.
Step 6: Restore Your Website After Reinstalling
Depending on your situation, you may need to restore:
- Posts and pages.
- Database content.
- Media uploads.
- Theme files.
- Plugin files.
- Menus.
- Widgets.
- Contact forms.
- eCommerce settings.
- Use Tools > Import within WordPress when restoring exported content.
- Use phpMyAdmin to import a full database backup.
- Reinstall themes and plugins if necessary.
- Compare site settings with previous backups to ensure everything matches.
Troubleshooting Common Reinstallation Issues
Database Connection Error
- Incorrect database name.
- Incorrect database username.
- Incorrect database password.
- Incorrect database host.
- Database server issues.
1. Open the wp-config.php file.
2. Verify all database details.
3. Confirm the database information in cPanel.
4. Contact your hosting provider if the problem persists.
Missing Files or Folders
- Incomplete file uploads.
- Incorrect installation directory.
- Missing or overwritten wp-content folder.
- Incorrect file permissions.
1. Re-upload missing WordPress files.
2. Confirm the installation path is correct.
3. Restore missing files from backup.
4. Check file and folder permissions.
Plugin or Theme Conflicts
- Outdated plugins.
- Theme incompatibility.
- Broken plugin files.
- PHP version compatibility issues.
1. Deactivate all plugins.
2. Reactivate plugins individually.
3. Switch temporarily to a default WordPress theme.
4. Update or replace incompatible themes and plugins.
5. Verify PHP version compatibility.
Post-Reinstallation Checklist
After reinstalling WordPress, complete the following checks:
- Visit the homepage.
- Test important pages.
- Test contact forms.
- Test checkout or booking functionality where applicable.
- Confirm dashboard access.
- Verify media files display correctly.
- Check menus and widgets.
- Review theme settings.
- Review plugin settings.
- Update WordPress core, themes, and plugins.
- Change administrator passwords after a security incident.
- Change FTP credentials if the site was compromised.
- Update database passwords if necessary.
- Check for broken links.
- Reconnect analytics and tracking tools if required.
- Re-enable caching and security plugins.
- Create a fresh backup once the website is fully operational.
Login to Domains.co.za Account
1. Go to the Domains.co.za website Account Login page.

2. Enter your Email and Password and click the Sign In button.
3. You will see the Domains.co.za Dashboard, displaying the Manage Account menu on the left and your Account Information, Account Overview and Open Support Tickets on the right.


